
How to Wax your Car - Step-by-Step Guide
Posted by MASTER 2

The most important thing you can do to protect your car’s clearcoat finish as well as maintain that just detailed look with a deep, wet shine is to regularly wash and wax the exterior paint. Before we dive into how to wax your car, my own personal teaching style is to not simply teach people how to do a task but to also teach them why to do it in such a way. Let’s begin!
There are two basic categories of waxes.
- Cleaner waxes
- Non-cleaning waxes
1: Cleaner waxes
Cleaner waxes also called AIOs, which means, All-in-One, are waxes that perform 3 functions in a single step.
1: Compound – remove swirls, scratches, water spots and oxidation.
2: Polish – refine the finish to maximize gloss and clarity.
3: Protect – leave behind some form of wax protection.
If your car is a daily driver and when you inspected the finish you found swirls and scratches, I would highly recommend starting with a great AIO. You can hand or machine apply this product and the results will look dramatically better than if you use a non-cleaning wax. If you remove paint defects to your satisfaction with an AIO you can always use a non-cleaning wax the next time you wax your car.
2: Non-cleaning waxes
These are waxes that do not contain any type of cleaning agents or abrasive technology. Other terms used to describe non-cleaning waxes are,
- Pure wax
- Show car wax
- Finishing wax
For the most part, this category of wax should only be used on paint in excellent condition. Paint in excellent condition is clean and smooth to the touch, (passes the baggie test). The best appearance results are achieved when there are no swirls and scratches, BUT if swirls and scratches don’t bother you and the paint on your car passes the baggie test or if it failed the baggie test and you removed the contamination via a mechanical process, (detailing clay or a detailing clay towel), then you can use a non-cleaning wax. To learn how to do the baggie test, check out this article.
The practical difference between a cleaner/wax and a non-cleaning wax
A cleaner/wax or AIO will clean and protect in one step. Because it’s cleaning or removing defects at the same time it’s protecting – this category of product cannot leave behind as much protection as a dedicated, non-cleaning wax.
A non-cleaning wax, also called a pure wax, finishing wax or show car wax, offers zero ability to clean the surface as you use it, or remove any defects. It will however leave behind more protection because this is its sole purpose.
How to choose the right wax for your car
If you have a brand-new car, fresh off the dealership’s showroom floor or car lot, and after washing and drying the car it passes the baggie test, then a non-cleaning wax would be the best choice.
If after washing and drying your car the paint does not pass the baggie test, then chances are, besides having bonded contaminants it’s also going to have other surface impurities like oxidation and traffic film. If the car is in fact a daily driver and more than a year old, and you live where it rains then it’s a given there’s going to be a dirt stain on the paint called traffic film or road film and the only way to remove this is by using a cleaner/wax aka an AIO.
This article will cover how to apply a non-cleaning wax for paint in good to excellent condition.
How to prep your car for waxing
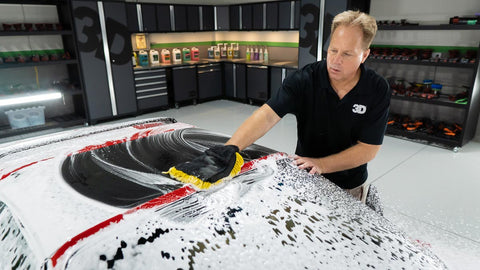
Step 1: Wash and dry the car first.
Kind of goes without saying but in an effort to be thorough and exact I’ve included this beginner step in-case anyone reading this is brand new to taking care of their car.
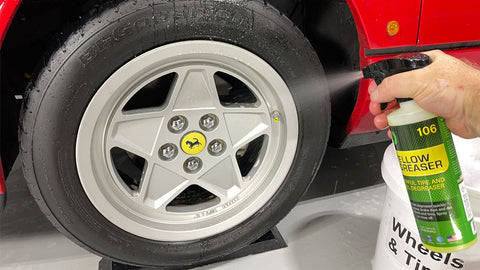
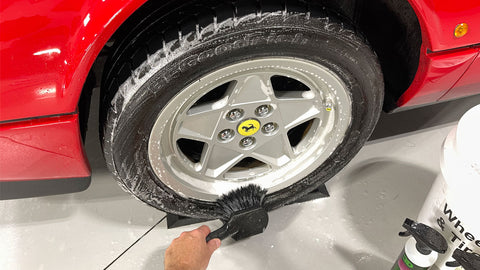
Wheels and tires first
In my detailing classes (and how I detail my own and client’s cars), I teach people to always start with wheels and tires first and then move to the top of the car and wash the car moving down and around to the lower panels. To wash your wheels and tires like a pro, you’ll need a quality wheel and tire cleaner like 3D Yellow Degreaser as well as quality brushes. I prefer to use a dedicated bucket to hold my wheel and tire brushes and I also like to add a quality car wash soap to assist in really getting the wheels and tires clean.
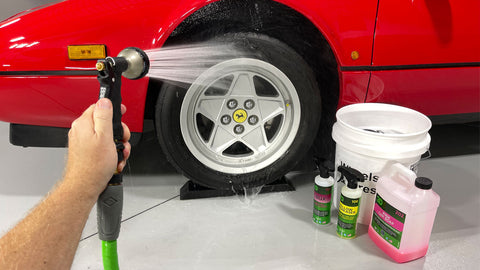
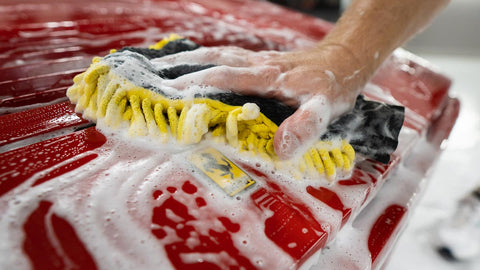
Wash the vehicle’s body second
Always use a quality car wash with a clean uncontaminated wash mitt and dry using a clean, uncontaminated drying towel. For this you want a high quality, pH balanced car wash soap like 3D Pink Car Soap.
Start at the top and then work your way down.
After washing and rinsing the car, always remove any standing rinse water to avoid water spots.
Step 2: Inspect paint using the baggie test.
If the paint on your car fails the baggie test this is a good sign you’ll want to use a detailing clay towel to mechanically decontaminate the paint. If you’ve never used a detailing clay towel, I will show you how in this article.
If the paint fails the baggie test it will likely also fail the visual inspection test and you’ll probably be better off to use a cleaner/wax or AIO instead of a non-cleaning wax.
Step 3: Inspect paint visually using good lighting.
If the weather is good, you can use overhead sunlight usually around noon when the sun is high overhead. You can also use good indoor overhead lighting or handheld swirl finder light. Non-cleaning waxes are intended for paint that is in excellent condition but… they can be used on cars that have swirls and scratches.
As long as you’re happy with how the paint looks, this is what is most important. The paint should pass the baggie test however because a non-cleaning wax will not remove bonded contaminants and the layer of contamination on the paint will actually prevent a non-cleaning wax from getting to the paint so it can make a proper bond.
How to apply non-cleaning liquid wax by hand
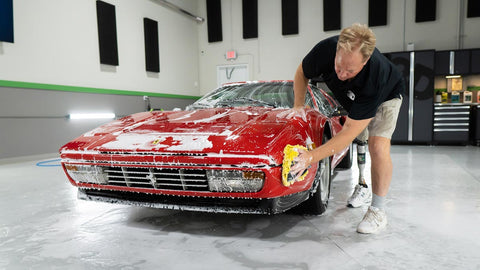
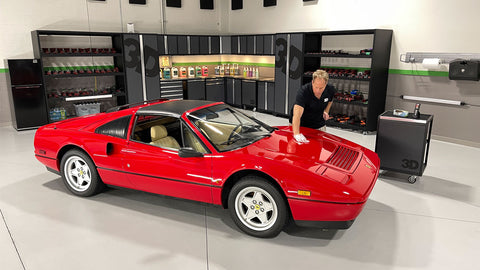
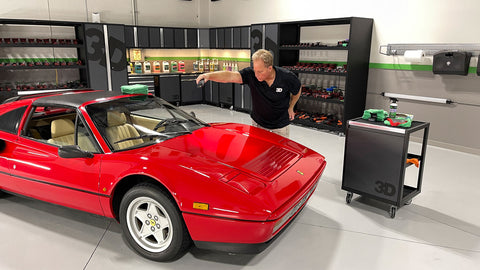
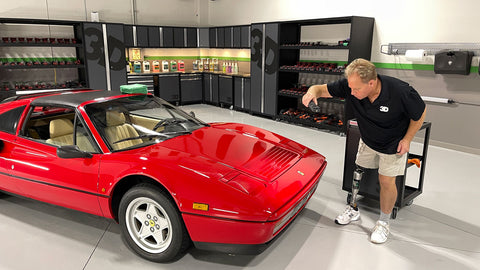
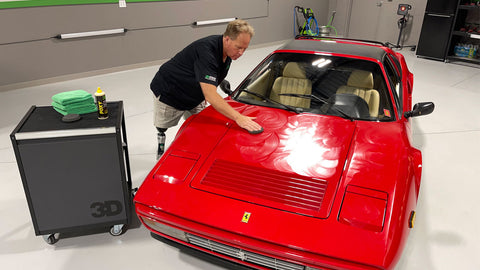
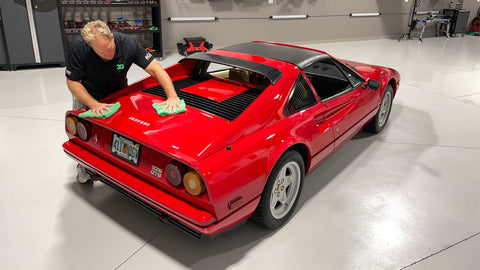
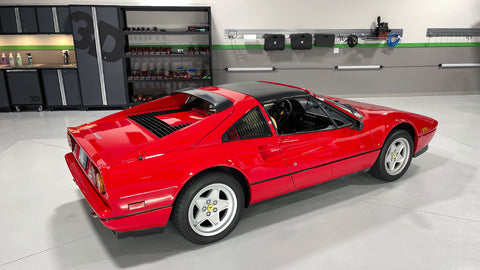
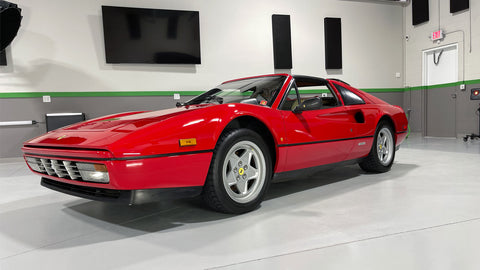
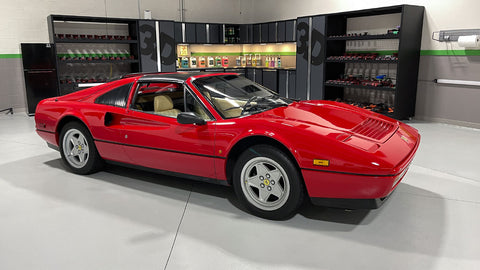
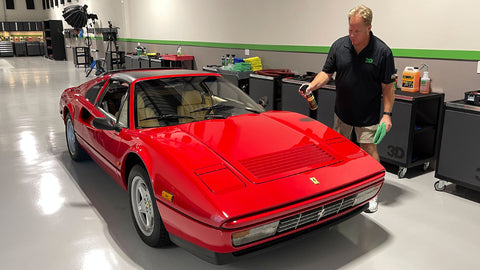
Detailing Project - 1987 Ferrari 328 GTS
This is a 1987 Ferrari 328 GTS with paint that fits the description for using a non-cleaning wax. The paint passed the baggie test and also the visual inspection test. The paint feels smooth to the touch and there are little to no visual swirls, scratches, water spots or oxidation. Paint in this condition is perfect for a non-cleaning wax or if you prefer, a pure wax or show car wax.
Wax options
3D offers a number of choices for non-cleaning waxes and paint sealants including,

3D Bead It Up is technically not a wax, it’s a polymer surface coating that can be used on pretty much any smooth surface on the outside of your car including, paint, plastic, glass, chrome and even the wheels. It can also be used on any smooth surface on the inside of your car and even the engine compartment. It can be used as a topper over the top of any of the other waxes listed above and as a maintenance product for any of the waxes listed above. It can also be used as a standalone product to protect your car’s finish just like a wax.
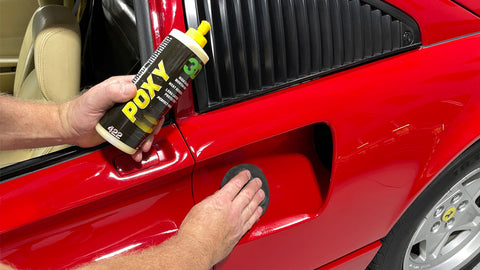
For this Ferrari, we’re going to use 3D POXY, which uses Montan Wax plus a blend of other synthetic polymer ingredients to add long lasting protection, UV protection as well as gloss and shine. I’ll share how to use Bead It Up to maintain the results you create with POXY towards the end of this article.
Supplies needed
Tips before you start
- Always work on a cool surface in the shade.
- Avoid getting wax on any exterior plastic trim.
- Apply a thin, uniform layer of wax - thick coats are difficult to remove and simply waste wax.
- Remove any jewelry like rings and watches before you start.
- When applying a non-cleaning wax, use an overlapping circular motion.
Step by Step Directions
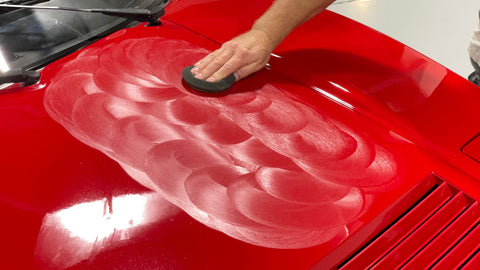
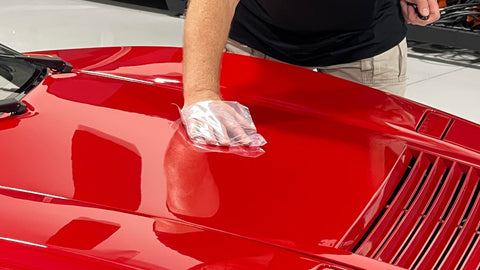
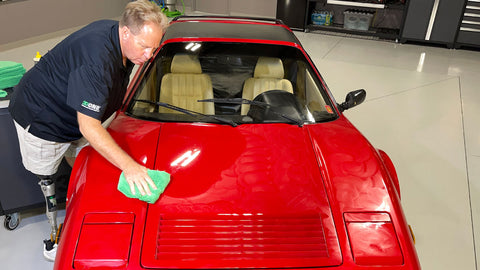
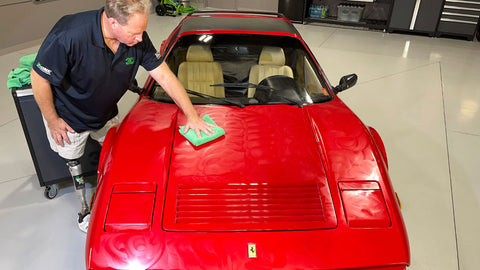
Step 1: Using a clean, round foam applicator pad, pour some wax onto the face of the pad.
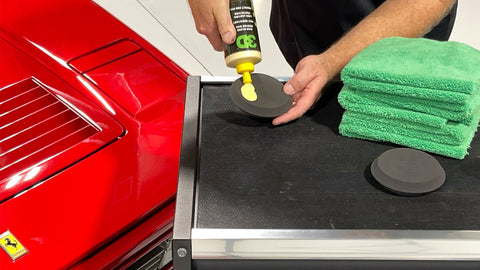
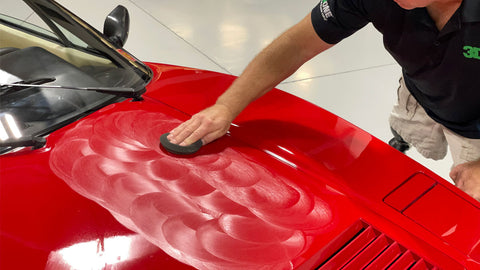
Step 2: Using an overlapping circular motion, apply and spread the wax over a panel or section of a panel.
Technique tip
When you first touch the wax applicator down onto a section of paint, you’ll tend to deposit the bulk of the wax on the face of the applicator onto the surface. As you move your hand in an overlapping circular motion, when your hand comes back around to the place you initially touched the applicator down, the foam will pick up the wax in this spot and as you continue to make an overlapping circular motion it’s very easy to spread the wax out over a larger surface.
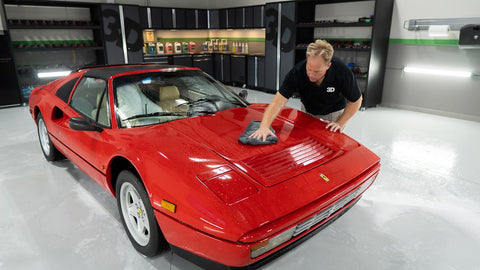
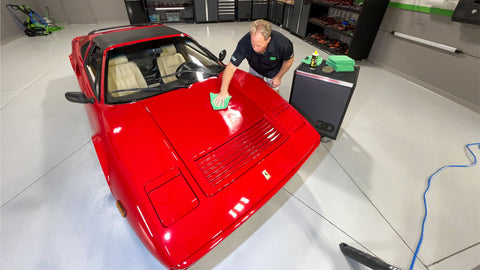
Once you have the wax spread out over the surface then work the wax over the panel to lay down a uniform thin layer of wax like you see in the picture.
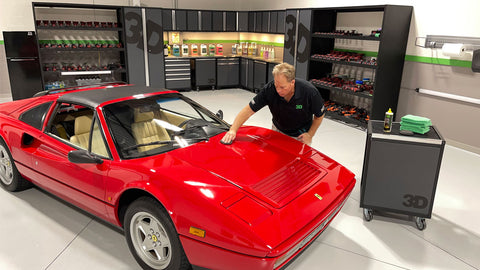
Repeat this process to all the various body panels.
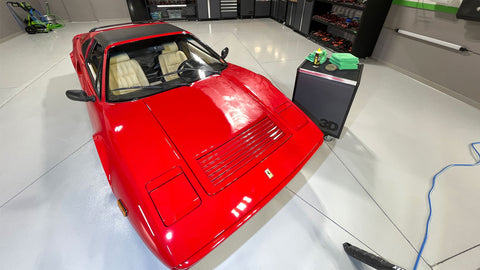
Here’s what a thin, uniform layer of wax looks like on the front clip of the Ferrari.
Frequently Asked Question: Can I apply the wax to the entire car and then remove it?
Answer: Yes.
As long as the wax you choose and use wipes off easily after drying to a haze. The most important factor when deciding to apply the wax to the entire car and then remove it or to apply to a single body panel and then remove it before moving onto the next panel is,
How easy is the wax to remove?
If the wax is difficult to remove, then it will be easier to remove the wax panel-by-panel. If the wax is easy to remove, then you can apply the wax to the entire car at once and then remove all at once afterwards. The good news is - POXY is super easy to wipe-off as long as you’re following the direction in this article and applying a thin layer of wax.
Here’s a few reasons to work panel-by-panel
- If you apply the wax and then remove the wax to a panel at a time the process won’t seem overwhelming.
- If you apply the wax and then remove the wax to a panel at a time you break up the two different actions, (applying and removing), and this actually makes the physical aspect of waxing the car easier.
- If you apply the wax and then remove the wax to a panel at a time, if something were to happen, which would cause you to have to stop detailing your car, for example a family emergency. Or what if you don’t have a garage and you’re doing this outside, and it starts to rain. Then working panel by panel is safer.
- If you only work panel-by-panel, you won’t get caught in a situation where you might have to stop in the middle of the process, which means stopping with unremoved wax on the car. This has happened to me so it could happen to you. But if you feel you can complete the process from start to finish without any interruptions, then “yes” you can apply POXY to the entire car and then switch over to removing the wax.
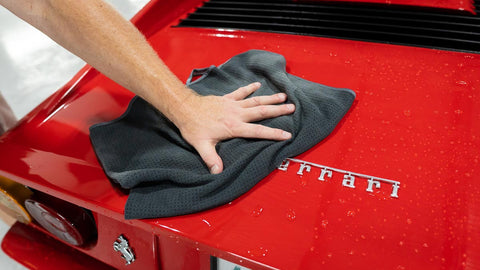
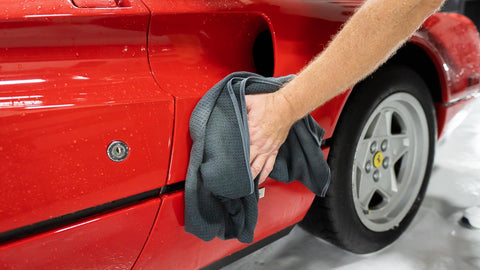
Step 3: Allow the wax to dry to a haze, about 10 to 15 minutes, and then using a clean, soft microfiber towel to gently remove the wax.
Here’s half and half
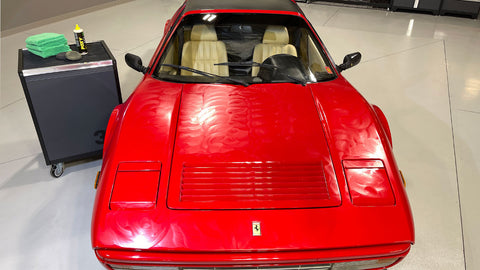
Here’s the final results…
Check out the deep, wet shine!
Future maintenance
Now that you’ve successfully waxed your car, what’s next?
The most important thing you can do to protect and extend the longevity of your car’s clearcoat finish is to,
1: Wash your car often and wash it carefully. See this article on how to wash a car carefully.
2: Wax your car at least twice a year – Before going into winter and at the beginning of spring.
Maintaining your car’s finish in-between normal washing
Now that your car’s finish has a fresh coat of wax, here’s a simple way to extend the wax protection that is quick, easy, and simple.
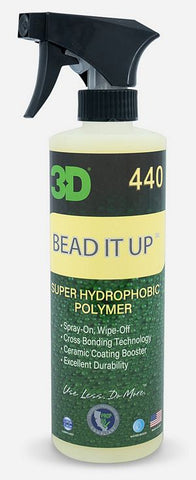
3D Bead It Up
3D Bead It Up is an easy-to-use spray-on polymer coating. You use it like a spray detailer except it does so much more. Bead It Up creates a hydrophobic surface that creates extreme surface tension. The surface tension in turn causes water to bead-up and roll off the car. When it rains your car will self-clean. When you wash your car, it will be faster and easier and drying will be faster and easier also.
While these are actually the key important features, what everyone really likes about Bead It Up is how it makes your paint feel slippery to the touch and how it creates a high gloss finish.
How to use 3D Bead It UP
Application is quick and easy and there’s multiple ways to apply 3D Bead It Up.
1: Spray on, wipe-off to a dry car
After washing and drying your car or if there is only light dust on your car, you can use 3D Bead It Up like a spray detailer. Simply mist a spray onto a panel, spread using a clean, microfiber towel, next flip or fold the towel to a dry side and re-wipe this section to a high gloss, slippery shine.
2: Use as a drying aid after washing and rinsing your car
After you have finished washing and drying your car, as you dry your car with your favorite drying towel, before wiping any standing water off a panel, mist a spray or two onto this wet panel and then using your favorite drying towel to remove the water and the Bead It Up at the same time.
3: Wet-on-wet rinsing
After you have washed and rinsed your car off, do a second or final rinse only before rinsing a panel first mist it with Bead It Up. Bead It Up is formulated to bond to a wet or dry surface. So, you can apply Bead It Up while rinsing your car. Then dry as you normally do.
Using 3D Bead It Up as a topper
Summary
Waxing your car is actually easy, rewarding, and relaxing. Just absorb the information shared in this article, take your time, and focus on the task at hand. One thing I know for sure, regular maintenance is easy maintenance. It’s only when we neglect our cars for extended periods of time that undoing the damage caused by neglect requires more time, more work, and more perspiration.
When you regularly wash and wax your car not only is future washing and waxing faster and easier, but you get to enjoy driving around in a clean shiny car and that’s a lot more fun than driving around in a dirty, neglected looking car. Another benefit is the visual perception benefit. When people see you getting into, driving or getting out of a clean, spotless and well maintained car, you make a great first impression and there’s never anything wrong with that.
Plus, when the day comes to sell or trade your car in, you’ll get a higher value simply because you took care of your vehicle, and it shows.
If you ever have any questions about waxing your car or any other detailing related topics, feel encouraged to reach out to me and I’m happy to help.
Sincerely,
Mike Phillips
SHARE: