
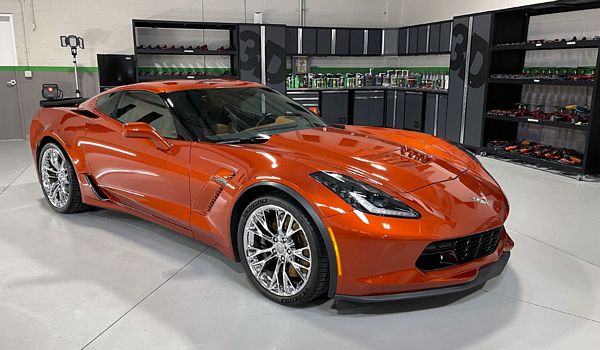
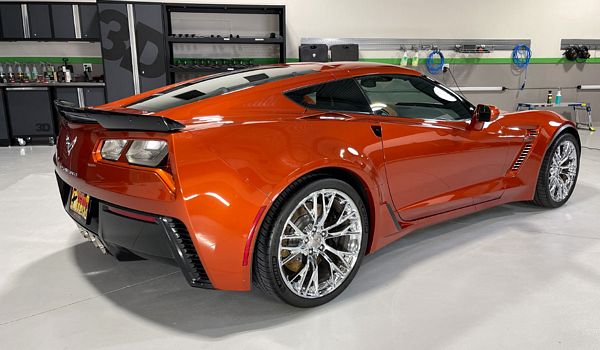
Review & How-To: 3D Graphene Infused Ceramic Coating Plus - 2015 Corvette Z06 in Daytona Sunrise Orange Metallic
Posted by MIKE PHILLIPS

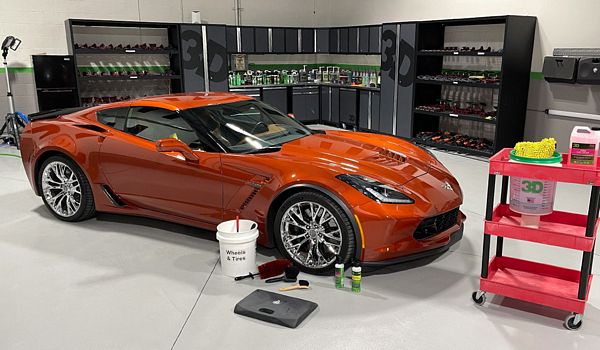
Backstory
This car belongs to a member of the local Stuart Corvette Club. The owner has done an excellent job of maintaining the entire car, inside and out, and upon my first inspection I was impressed with the overall appearance of the car. The current owner has been using a conventional carnauba wax to maintain the clearcoat finish and to be honest, the paint and the car looked amazing before I even lifted a finger. The owner has seen and spoken with some of the other members of the Corvette club that I have detailed cars for and after hearing all the great things about ceramic coatings, he made the decision to get his Corvette ceramic coated.
How-To
I discussed the process with the owner and explained that even though the car looks beautiful in its current state, in order to professionally install a ceramic coating, the paint would need to be machine polished. The reason for the machine polishing is to get the paint down to pure bare-naked paint. Machine polishing will not only perfect the paint to an even higher level than it is now, it will also remove paint defects like swirls, scratches, light washing induced marring PLUS it will remove any and all previously applied waxes or any other substance off the paint. Always know that commonly used products like spray detailers deposit some kind of gloss enhancing chemicals like silicone, waxes and/or other proprietary ingredients. And the ONLY way to know these substances are removed completely 100% is to machine polish the paint.
Here's the normal steps I perform for paint that is in good condition.
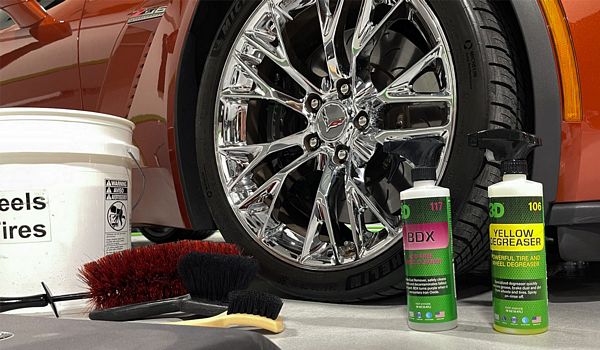
Step 1: Wash wheels and tires. (this is a part of any normal detail job)
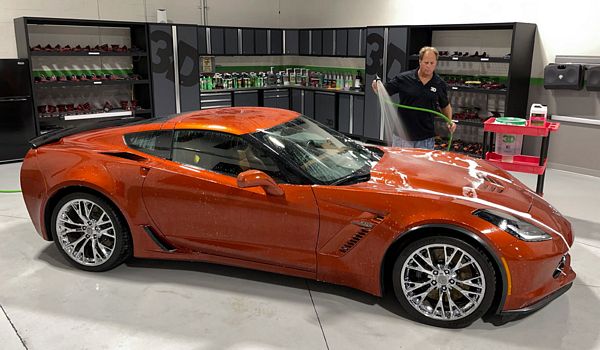
Step 2: Wash the car starting at the top and working your way down and around the various body panels.
Step 3: Dry the car. For this I used an EGO 650 CFM Leaf Blower. Works great especially to blow water out of all the cracks, crevices and emblems.
Step 4: Inspect the paint for above surface bonded contaminants using the Baggie Test.
Step 5: Mechanically decontaminate the paint using the 3D Detailing Clay Towel. (baggie test revealed light contamination)
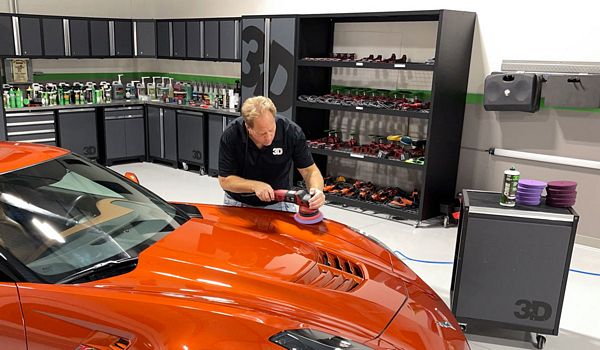
Step 6: Paint correction using 3D ONE with foam cutting pads on the FLEX BEAST.
Step 7: Paint polishing using 3D ONE with foam polishing pads on the FLEX BEAST.
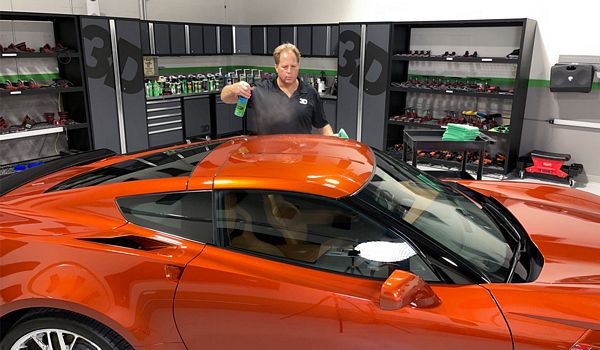
Step 8: Prepping the paint for the coating using 3D WIPE.
Step 9: Installing the 3D Ceramic Coating Plus - Graphene Infused coating
Step 10: Installing a second layer of the graphene infused ceramic coating.
Step 11: 24 hours later I wiped all the paint, glass and any other smooth surface with 3D Bead It Up.
Step 12: Dress the tires using 3D SPEED Dressing.
Step 13: Wipe down all jambs, trunk, hood and door with 3D Bead It Up.
Total time: Around 12 hours from start to finish.
Step 1: Wash wheels and tires
For this I used the 3D Yellow Degreaser for the tires and 3D BDX for the wheels.
Step 2: Wash car
For this I used the 3D Pink Car Soap with a 3D Microfiber Chenille Wash Mitt.
Start by pre-rinsing the car to remove any loose dirt.
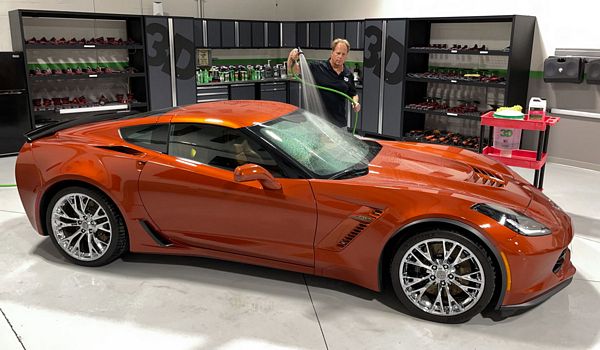
Then wash starting from the top and working your way down and around the car.

Rinse thoroughly after washing
Steps 3, 4 & 5
No pictures (someone has to do the actual work)
Step 6 & 7: Paint correction
For this step I used the 3D ONE, which is a hybrid combination compound/polish. You can use this product like a compound with more aggressive pads or use it like a polish using softer foam polishing and finishing pads.
Step 8: Prep the paint
If you're NEW to ceramic coatings, this is the extra step that you normally wouldn't do if you were to apply a car wax or synthetic paint sealant. At this stage of the process you MUST be very careful when removing the WIPE so as not to accidentally mar the paint. I strongly recommend having plenty of clean, PRE-INSPECTED microfiber towels on hand and ready to go.
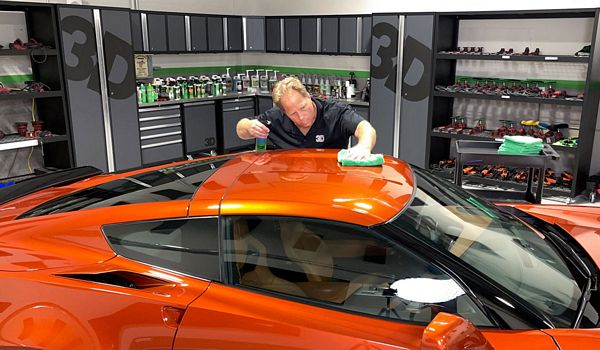
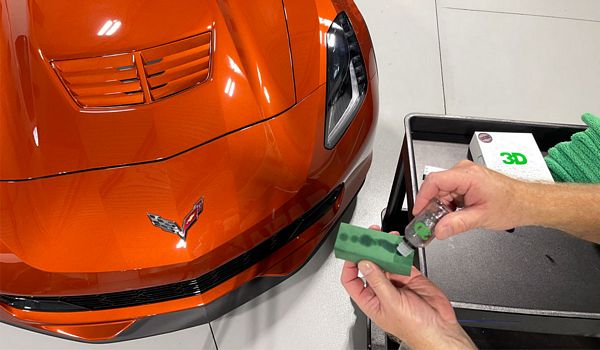
Step 9: Install the ceramic coating
Unlike a traditional car wax or paint sealant, graphene infused ceramic coatings are installed very carefully and methodically using a microfiber suede applicator cloth wrapped around a small foam applicator block. You normally only tackle small sections at a time. After applying the ceramic coating using a crosshatch pattern, you wait 30 to 45 seconds and then wipe this section of paint with a clean, dry contaminant-free microfiber towel. This wiping evens out the coating and removes any excess.
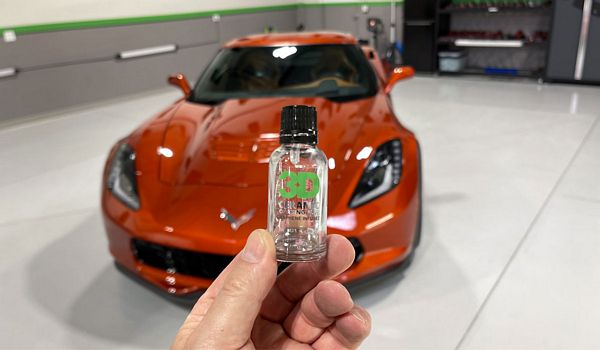
To use the coating, simply dab or pour some of the coating out of the tiny glass bottle onto the suede cloth.
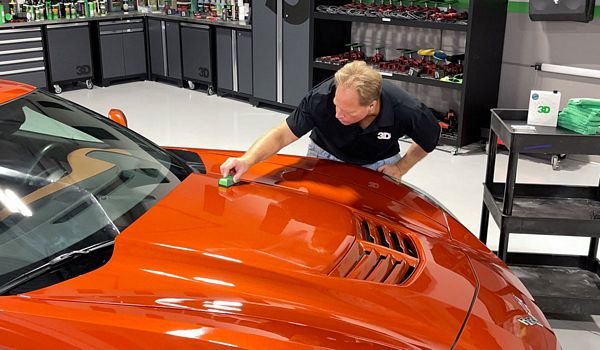
Then using a crosshatch pattern, apply a uniform layer of coating onto a section of a body panel.

Use ambient light to see the coating placement as it is a clear, thin liquid.
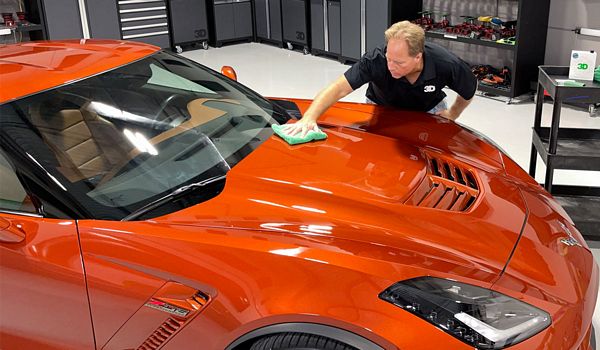
After 30 to 45 seconds, use a clean, soft microfiber towel to even out the film of coating on the surface plus remove any excess.
My comments...
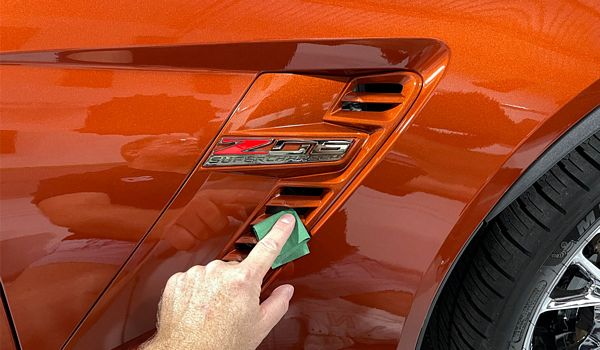
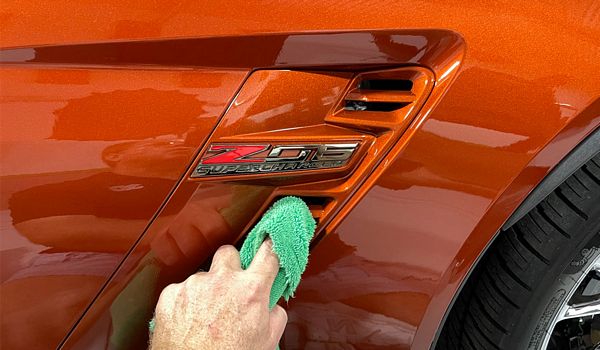
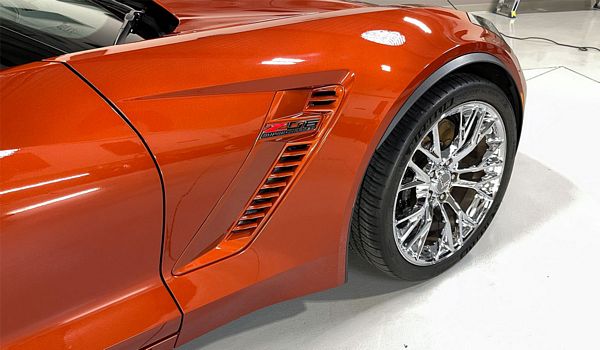
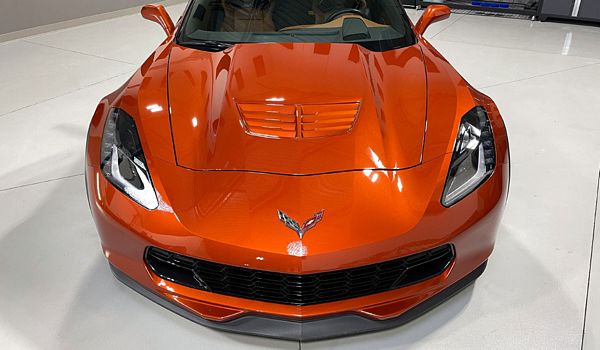
The most difficult areas to coat were the louvers on the hood and located in the sides of the front fenders but with a little patience, it can be done.
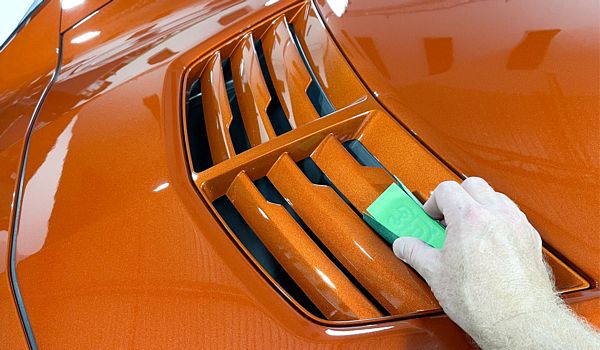
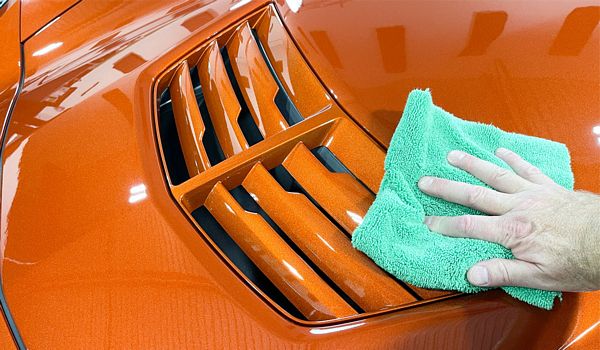
Sometimes it works better to simply use your finger with the suede cloth.
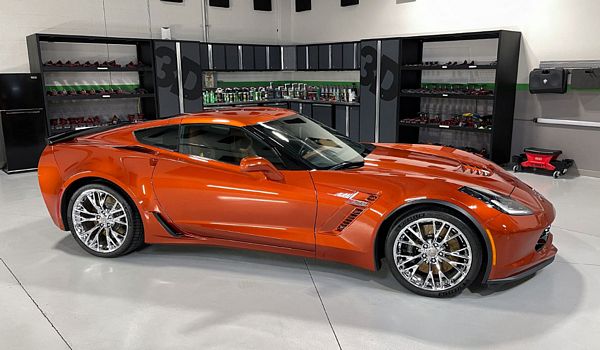
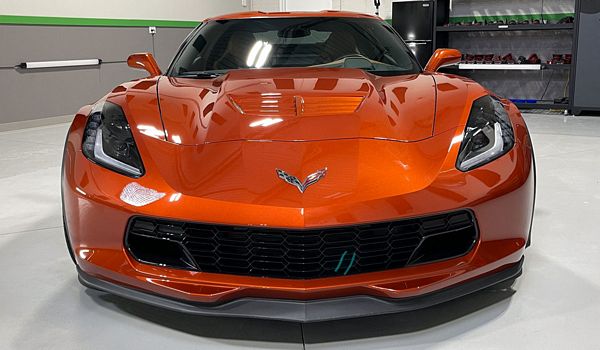
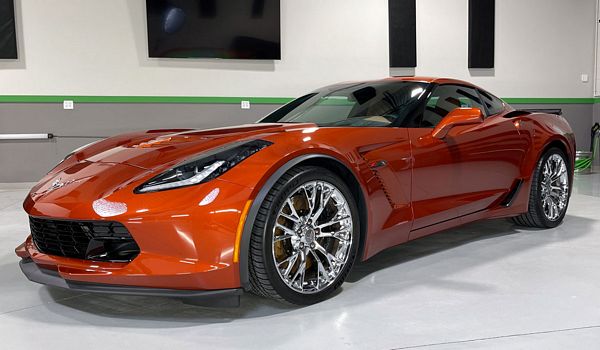
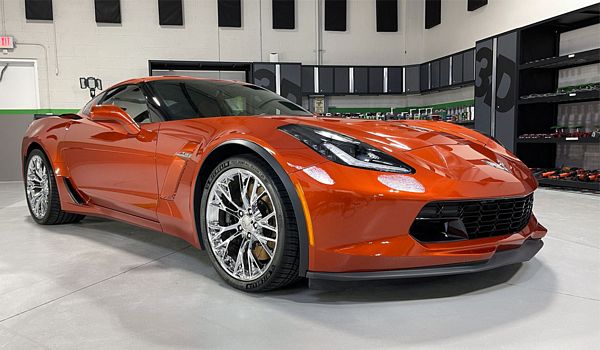
Here's the final results...
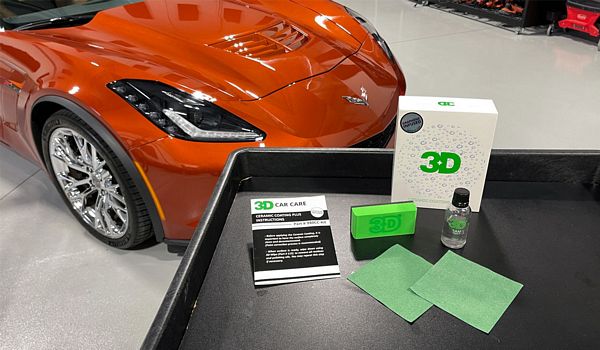
Here's the bottle after 2 applications. There's just a tiny bit left at the bottom of the bottle.
Review: 3D Graphene Infused Ceramic Coating Plus
Functional Graphene
There's a difference between functional graphene and graphene that is only floating around in the bottle but not actually adding any benefits in and of itself. Graphene offers a lot of benefits and creating a formula where the graphene is actually functional requires a lot of advanced chemistry and science.
What makes our graphene coating stand out from the rest?
While no car care products manufacturer is going to share proprietary information about their formulas, I asked our team of Chemists to provide some technical information on how our NEW 3D Graphene Infused Ceramic Coating Plus acts as a true functional graphene coating compared to others out there, and here is what they shared:
From the Chemists at 3D
To improve the resistance and durability, the coating is reinforced by monolayer platelets of graphene that create an even stronger matrix for protection. This coating is not only hydrophobic, but also oleophobic which means that it doesn’t like oils or rejects oils making it the perfect protection against a wider spectrum of contaminants.
Stress Tests
We applied a strong alkaline degreaser, acetone, 99% IPA, and an acidic wheel cleaner, Wheel Brite to a 940 coated car and it maintained excellent water beading characteristics and also looked just as when it was first applied.
And to say it again, when choosing any category of product, trust an established MANUFACTURER, with a great reputation for quality products. Let the newbies to car detailing spend (or waste) their money with marketing companies.
Application
The application of this coating is straightforward and it applies, or to use the lingo of the ceramic coating world, it installs, just like most coatings that come in a tiny glass bottle. After doing all the prep work, you simply apply the coating to the included microfiber suede cloth after first wrapping it around the foam applicator block. For larger panels, I divided them into smaller, more manageable sections using a crosshatch pattern. I normally go over each section 4 times using a crosshatch pattern. There's nothing magical about the number 4, the bigger picture is to simply cover each square inch of paint with the coating and to the best of your ability, apply or install a uniform layer of coating.
Wipe-Off
This coating levels-out and wipes off effortlessly. This of course assumes you're using a quality microfiber towel as one half of a person's experience with any wipe-on, wipe-off product is the towel, not just the product. If you're brand new to installing a ceramic coating, it's important to know that when you go to remove the coating, your initial passes are not to remove the coating as they are to further spread the coating and even the layer of coating out over the section being treated. By the time you start wiping, the coating will have begun to flash-off. Flash-off is ceramic coating lingo that means evaporate, this means the solvents used a carrying agents to suspend the actual ceramic and graphene solids will evaporate and leave the solids, which is the actual coating, behind on the paint where it will next cure over the next few days. So don't think the wiping off process is as simple as wiping off a traditional wax, it's more than that as you are both spreading, leveling and then at the very end, removing any excess coating.
Appearance
As you can see by the after pictures above, the 3D Graphene Infused Ceramic Coating Plus makes the paint look incredibly glassy. The paint takes on a vibrancy, clarity and gloss that a conventional wax or paint sealant simply cannot deliver.
Silky to the touch
Here's where this coating is different from most, if not the majority of coatings on the market today. Most coatings leave the paint feeling rubbery. By this I mean, the paint feels the OPPOSITE of slippery. Here's what I know about people and their cars - people LOVE their car's paint to feel slick and slippery.
I would even go as far as to say that having the paint on their car feel slick and slippery is just as important as any other aspect of their car's appearance and performance. It's not enough for the paint to LOOK good - it has to FEEL as good as it looks. And this is where coatings have left people wanting more because of this rubbery or tacky feeling they leave behind.
So as I wiped the coating after the application it was a pleasant surprise to feel the paint become slippery as I was wiping - this is simply something I have not experienced with all the other coatings I've used in my life. This is also something I know you are going to love.
Besides the slippery results of feeling good to the touch, this slippery characteristic also makes washing and drying the paint faster, easier and safer and this also applies to anytime you wipe the paint with a microfiber towel. This is important. Why? Because when a coating leaves the paint feeling rubbery or tacky - microfiber towels will GRAB the paint instead of gliding over the paint. So having a coating that leaves the paint feeling slippery is a HUGE feature for a coating.
Water Beading
I did not spray any water on this car because that would be just wrong. But I have sprayed water on a test panel that I've used this coating on and the water beads were exactly what you're looking for, tight, tall and small.
Protection
This new graphene infused ceramic coating protects better and longer than their original ceramic coating and as well or better than most coatings.
Me?
I always tell people when it comes to picking any product, whether it's a compound, a coating, a tire dressing or a car wash, pick a product from a brand you trust. If you're new to ceramic coatings, this new 3D Graphene Infused Ceramic Coating Plus is super easy to use.
The key thing is the prep work. The paint must be clean, smooth and free from any contamination or impurities. This is why my own personal rule when it comes to installing a ceramic coating is I must do at least ONE machine polishing step to ensure I'm working on clean, pure paint.
Plus machine polishing, even just a one-step process, will remove the majority of shallow swirls, scratches, water spots and oxidation. In most cases, your car's finish will be better than the day it was purchased.
Next steps...
After installing the 3D Ceramic Coating, the next thing you want to do is a combination of carefully washing your car with a pH balanced premium quality car wash soap, always with a clean uncontaminated wash mitt. And follow washing and drying with a light mist of the 3D Bead It Up to maintain the high gloss, hydrophobic finish.
I recommend using a Microfiber Chenille Wash Mitt when doing a Maintenance Wash like this one,
3D Microfiber Chenille Wash Mitt
Use 3D Bead It Up after washing to maintain the ceramic coating.
And after you use and fall in love with Bead It Up, read my article here,
3D Bead it Up - Do yourself a huge favor and purchase by the gallon
I hope the above how to article and review helps you to choose and use the right product to protect and maintain your car. If you have any questions, please feel free to contact me.
Sincerely,
Mike Phillips
SHARE: